A good architectural rendering is not one that conforms to “rules” or industry conventions. This was made clear by every Winner of the One Rendering Challenge, each of which was unique in its composition, style and narrative. Having said all that, there are certain tips and best practices that can help elevate your architectural visualizations to another level. If you’re wondering what these might be, who better to ask than the professionals?
Duy Phan, Iman Kimiaei, Yasmin Tzeiman and Gabi Lagomarsino are all rendering artists plying their trade on Fiverr, a global marketplace for freelancers with expertise in specialist services including architecture, design and visualization. Each of them achieved recognition as a Finalist in the One Rendering Challenge, with Duy Phan creating two Commended Entries.
We asked these four talented designers for their go-to rendering tips, and they provided some amazing advice. Use the following tricks to up your rendering game and achieve success in this highly competitive field:
From Duy Phan:
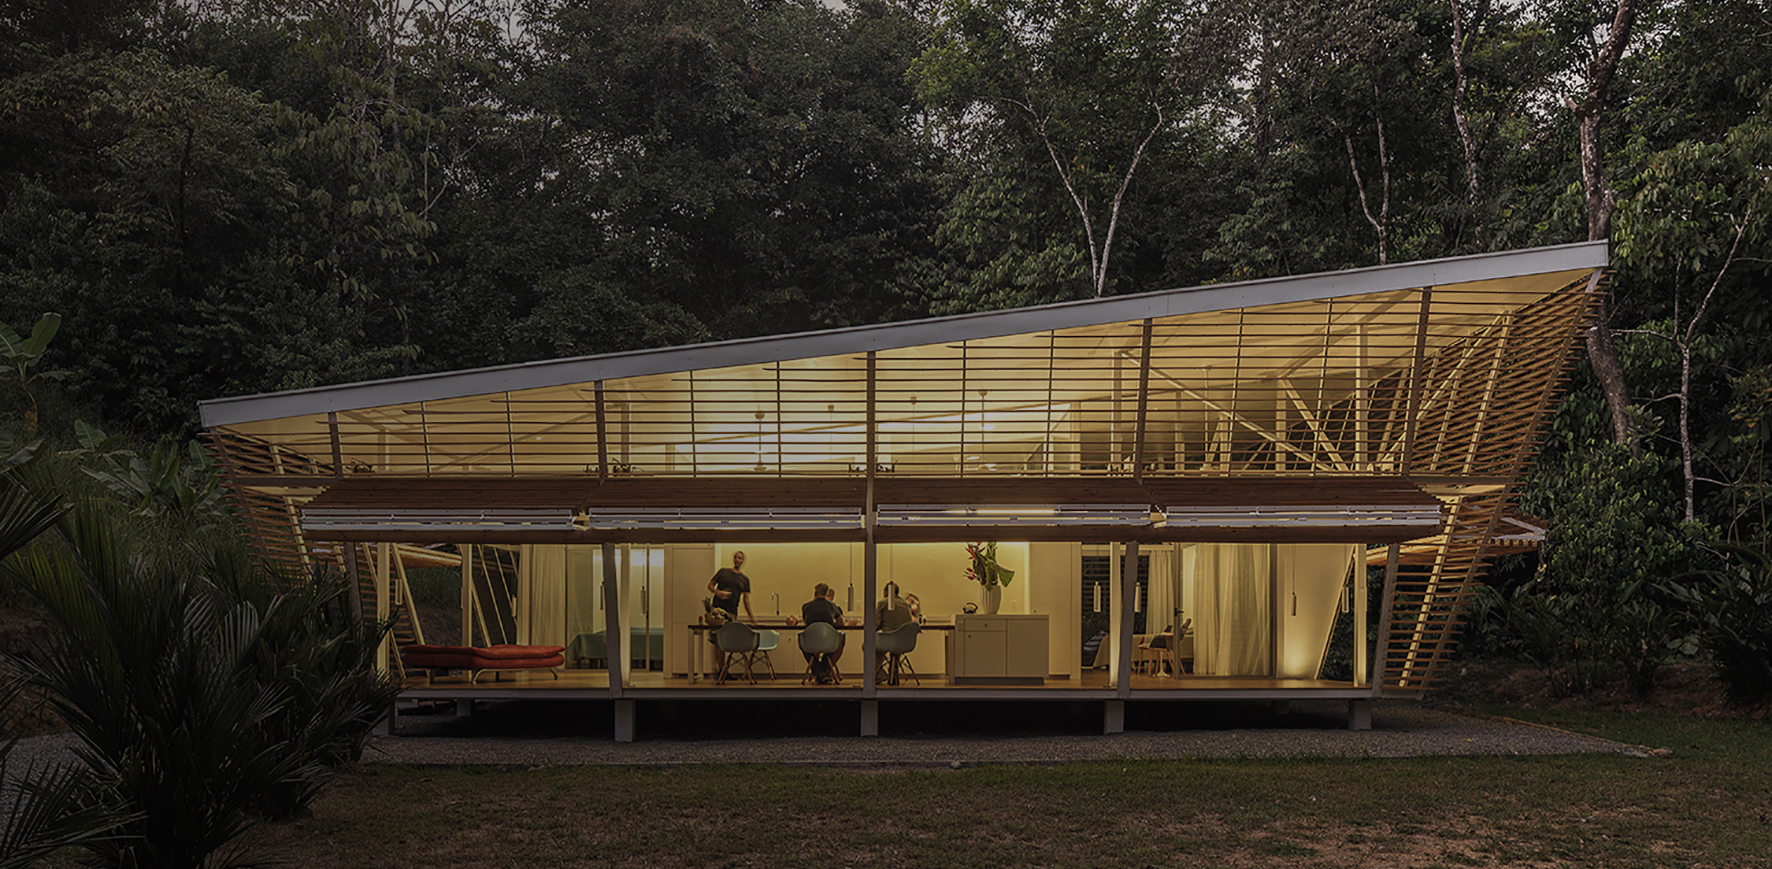
Renderings by Duy Phan
1. Sketch first, always!
Sometimes you might find yourself working really hard on the details of your file, only to realize the overall image doesn’t align with your original idea. Sketching your scene first not only helps you to quickly imagine your composition, it also keeps you on the right path as you work. Whenever you stray from the concept, the sketch can remind you to focus on the most valuable areas of the composition.
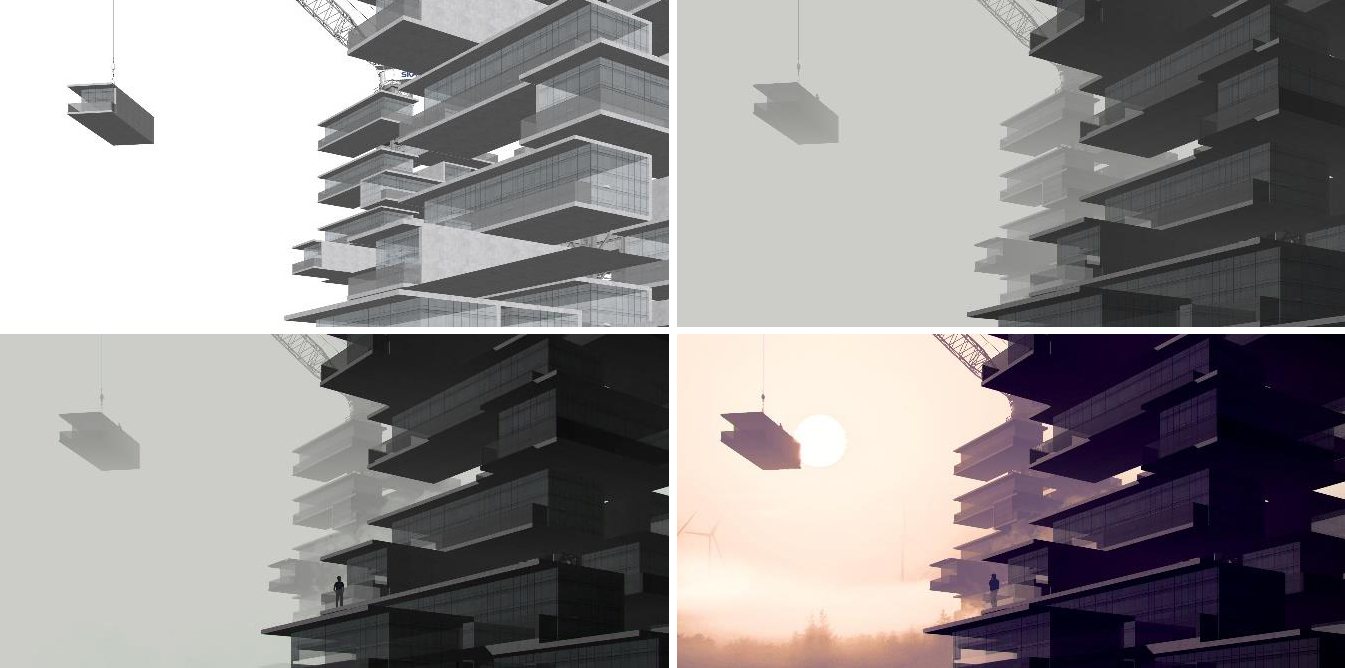
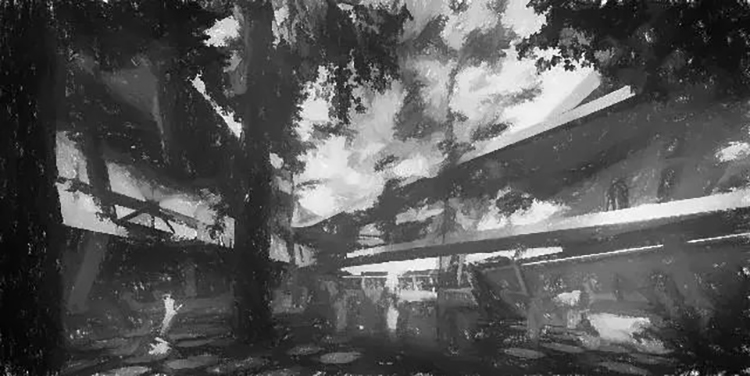
Renderings by Duy Phan
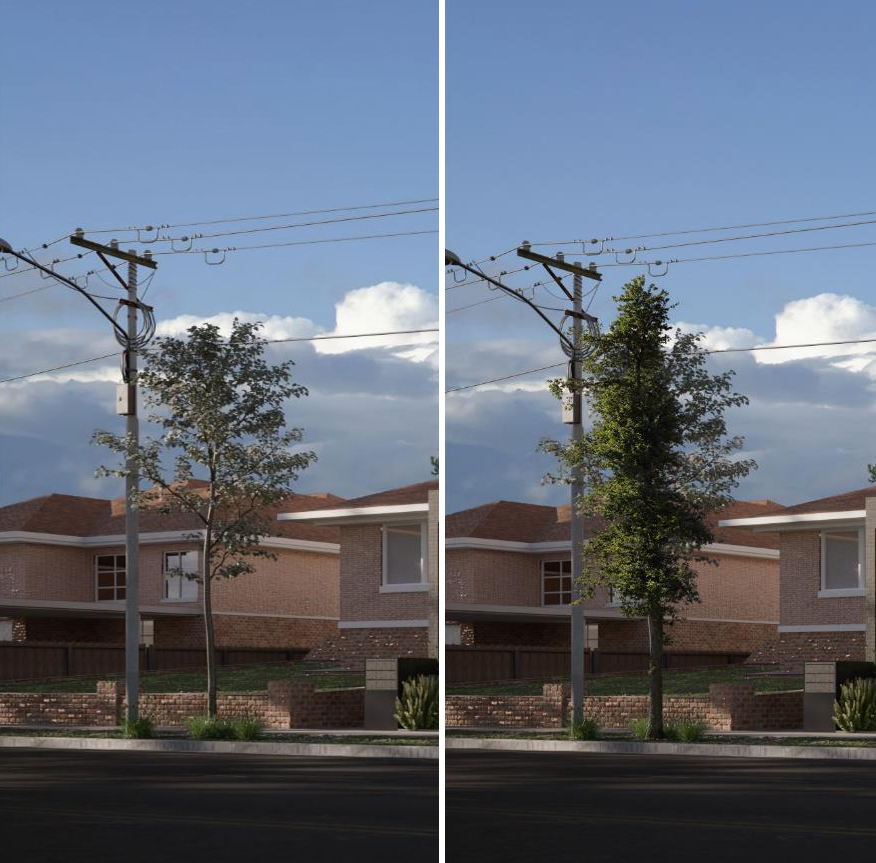
2. The 3-ground rule: fore, mid & back
As well as placing the “main-actor” on the stage, you should have supporting actors in order to tell the story you are planning. In this case, supporting actors are usually in the foreground and background of the image. You can see how important these “supporting-grounds” are in the comparison of before and after images above.
Typically, giving the fore & backgrounds different light intensities makes sense, as it helps you to make the focal point stronger.
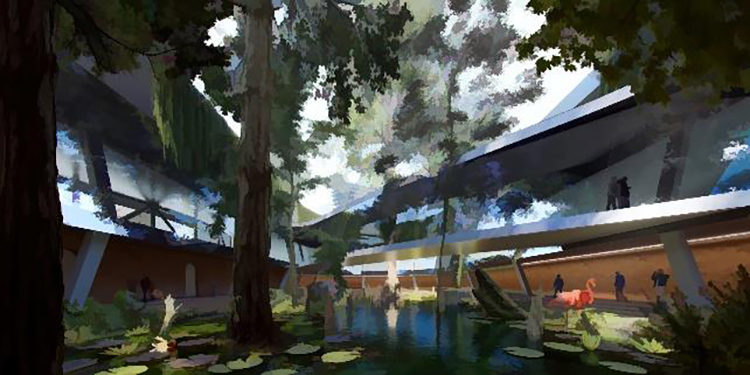
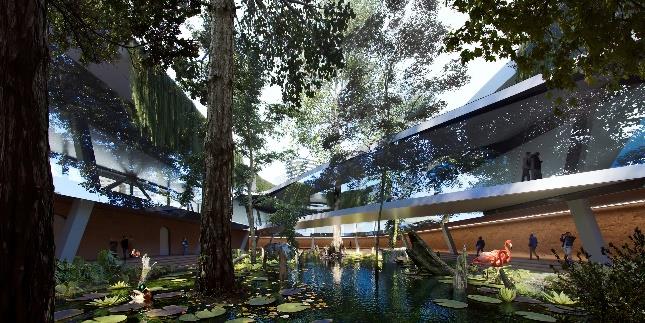
Renderings by Duy Phan
3. 3d or 2d?
You could populate the whole scene by 3d assets and vegetation, but it doesn’t mean you should. Using cut-out 2d assets will save you more time than you expect! In an appropriate context, a well-captured photo can look more “realistic” than the full CGI asset, avoiding you having to buy a 3d model or investing too many hours creating one asset yourself.
From Iman Kimiaei:
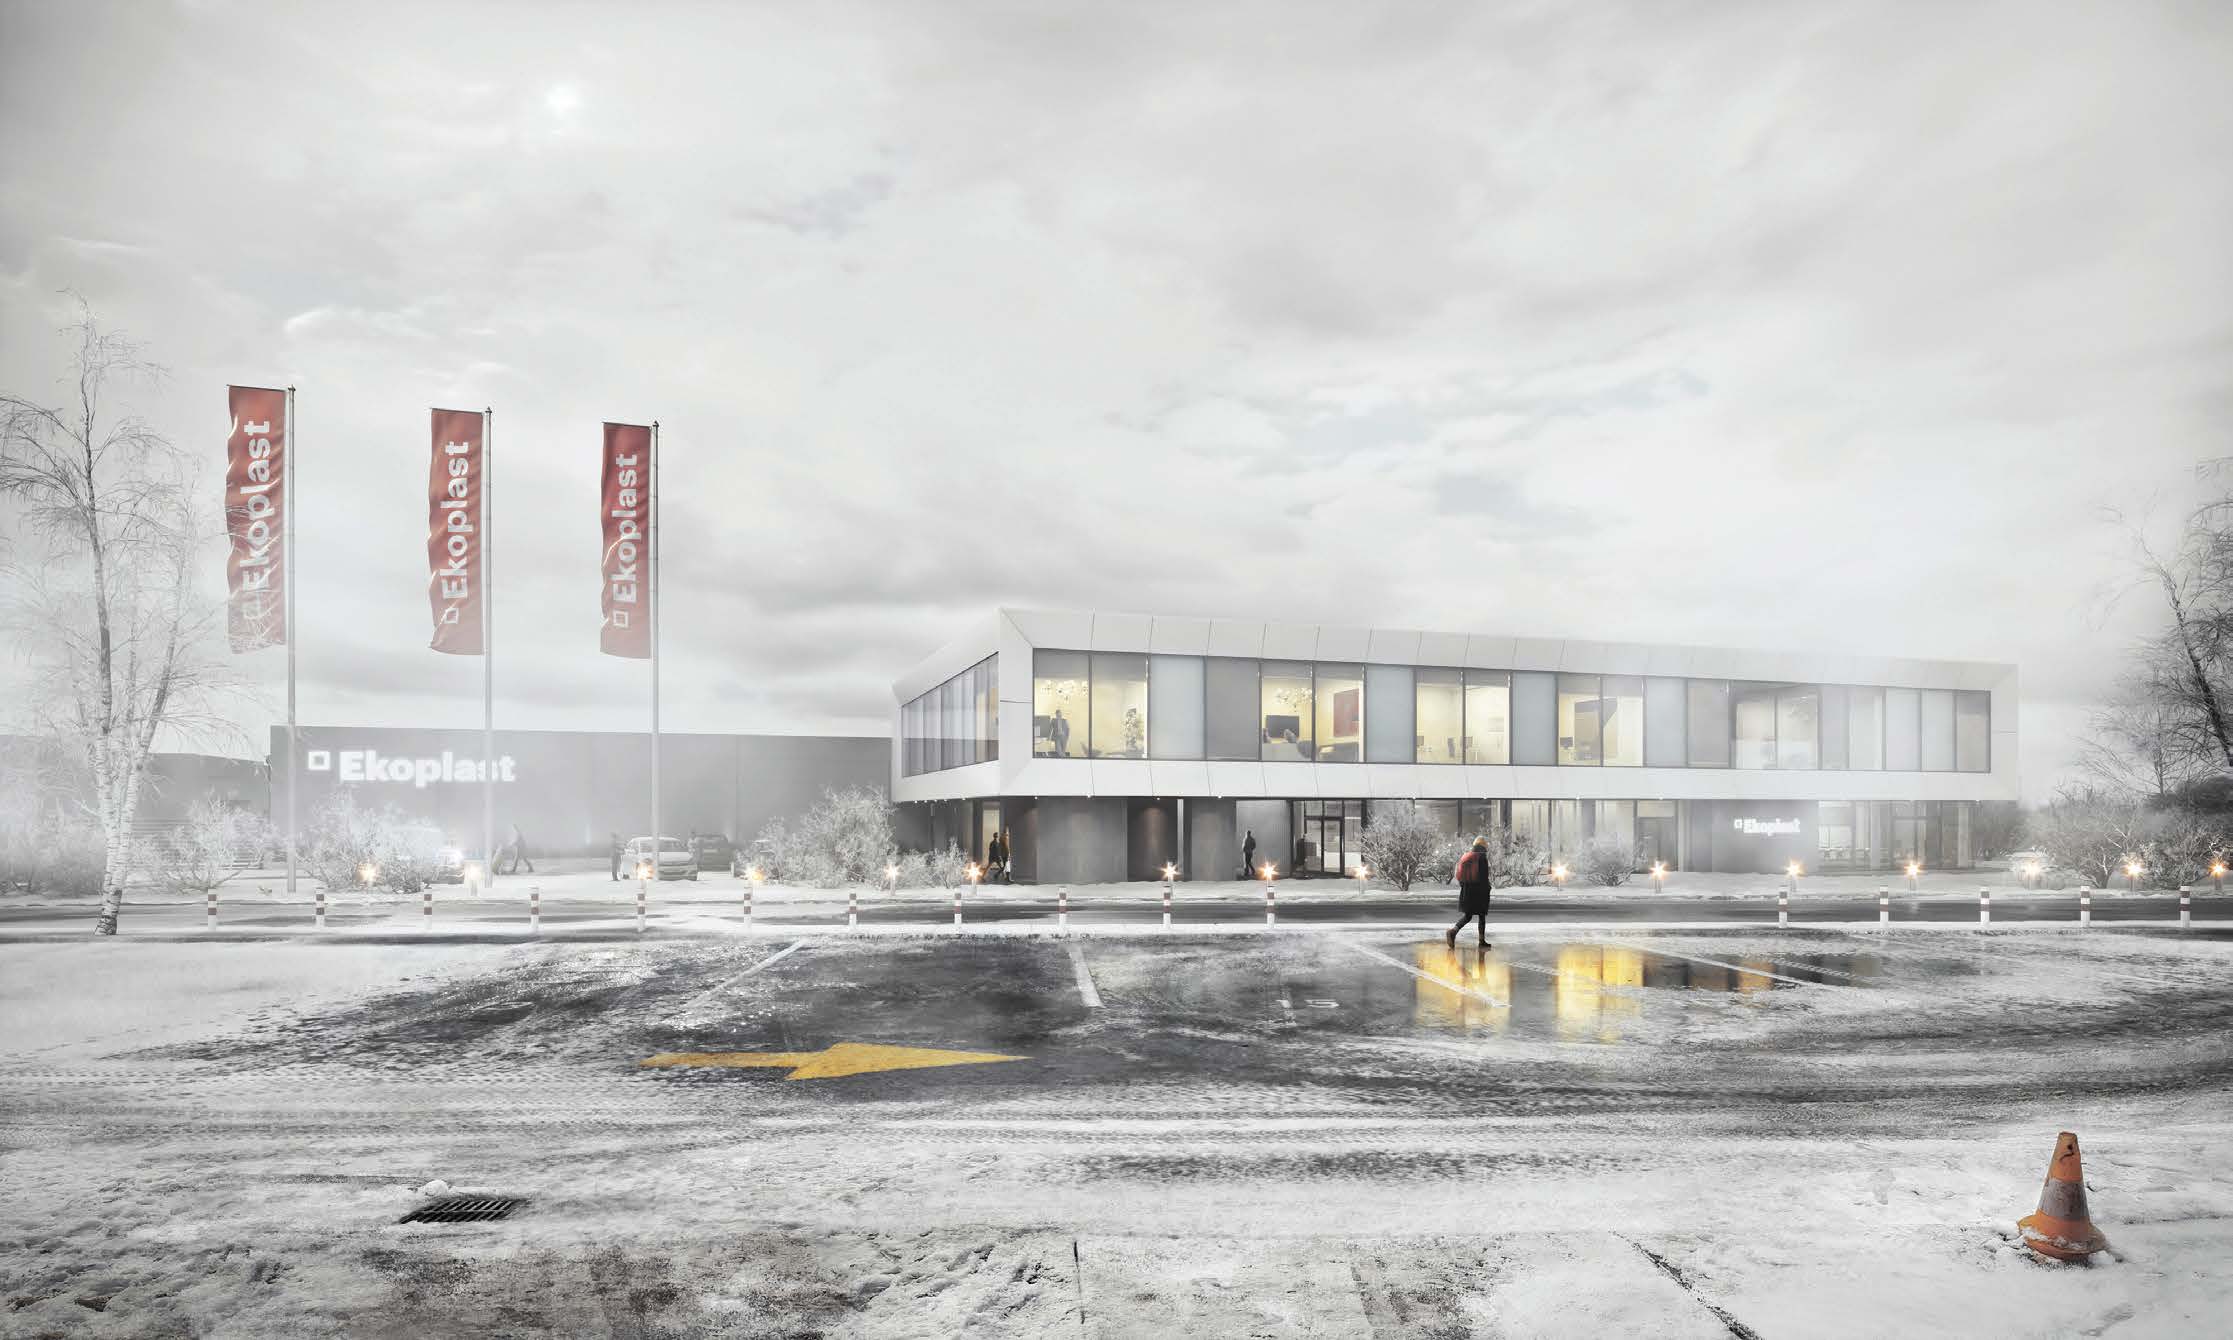
Ekoplast by architect Max Kobiela; visualization by Kimagination
4. Break the chains of your medium
Most of us search for inspiration within a limited circle of sources that have only been masterfully done in the medium that we are currently working on. However, the greatest artists in history always seek their ideas in other mediums. One medium that can provide infinite amounts of ideas for architectural rendering is cinema. Cinema is a combination of all the other forms of art. From literature to painting and music, these are all served to you in a full package.
When I was making a visualization for the architect Max Kobiela, I was inspired by the movie Fargo by the Cohen brothers. Although it was an industrial building, the architectural design followed the language of simplicity, and after I had a brainstorm with the architect, we both felt it was a good direction to create a “Minnesotan” environment to emphasize the warm colors inside the building.
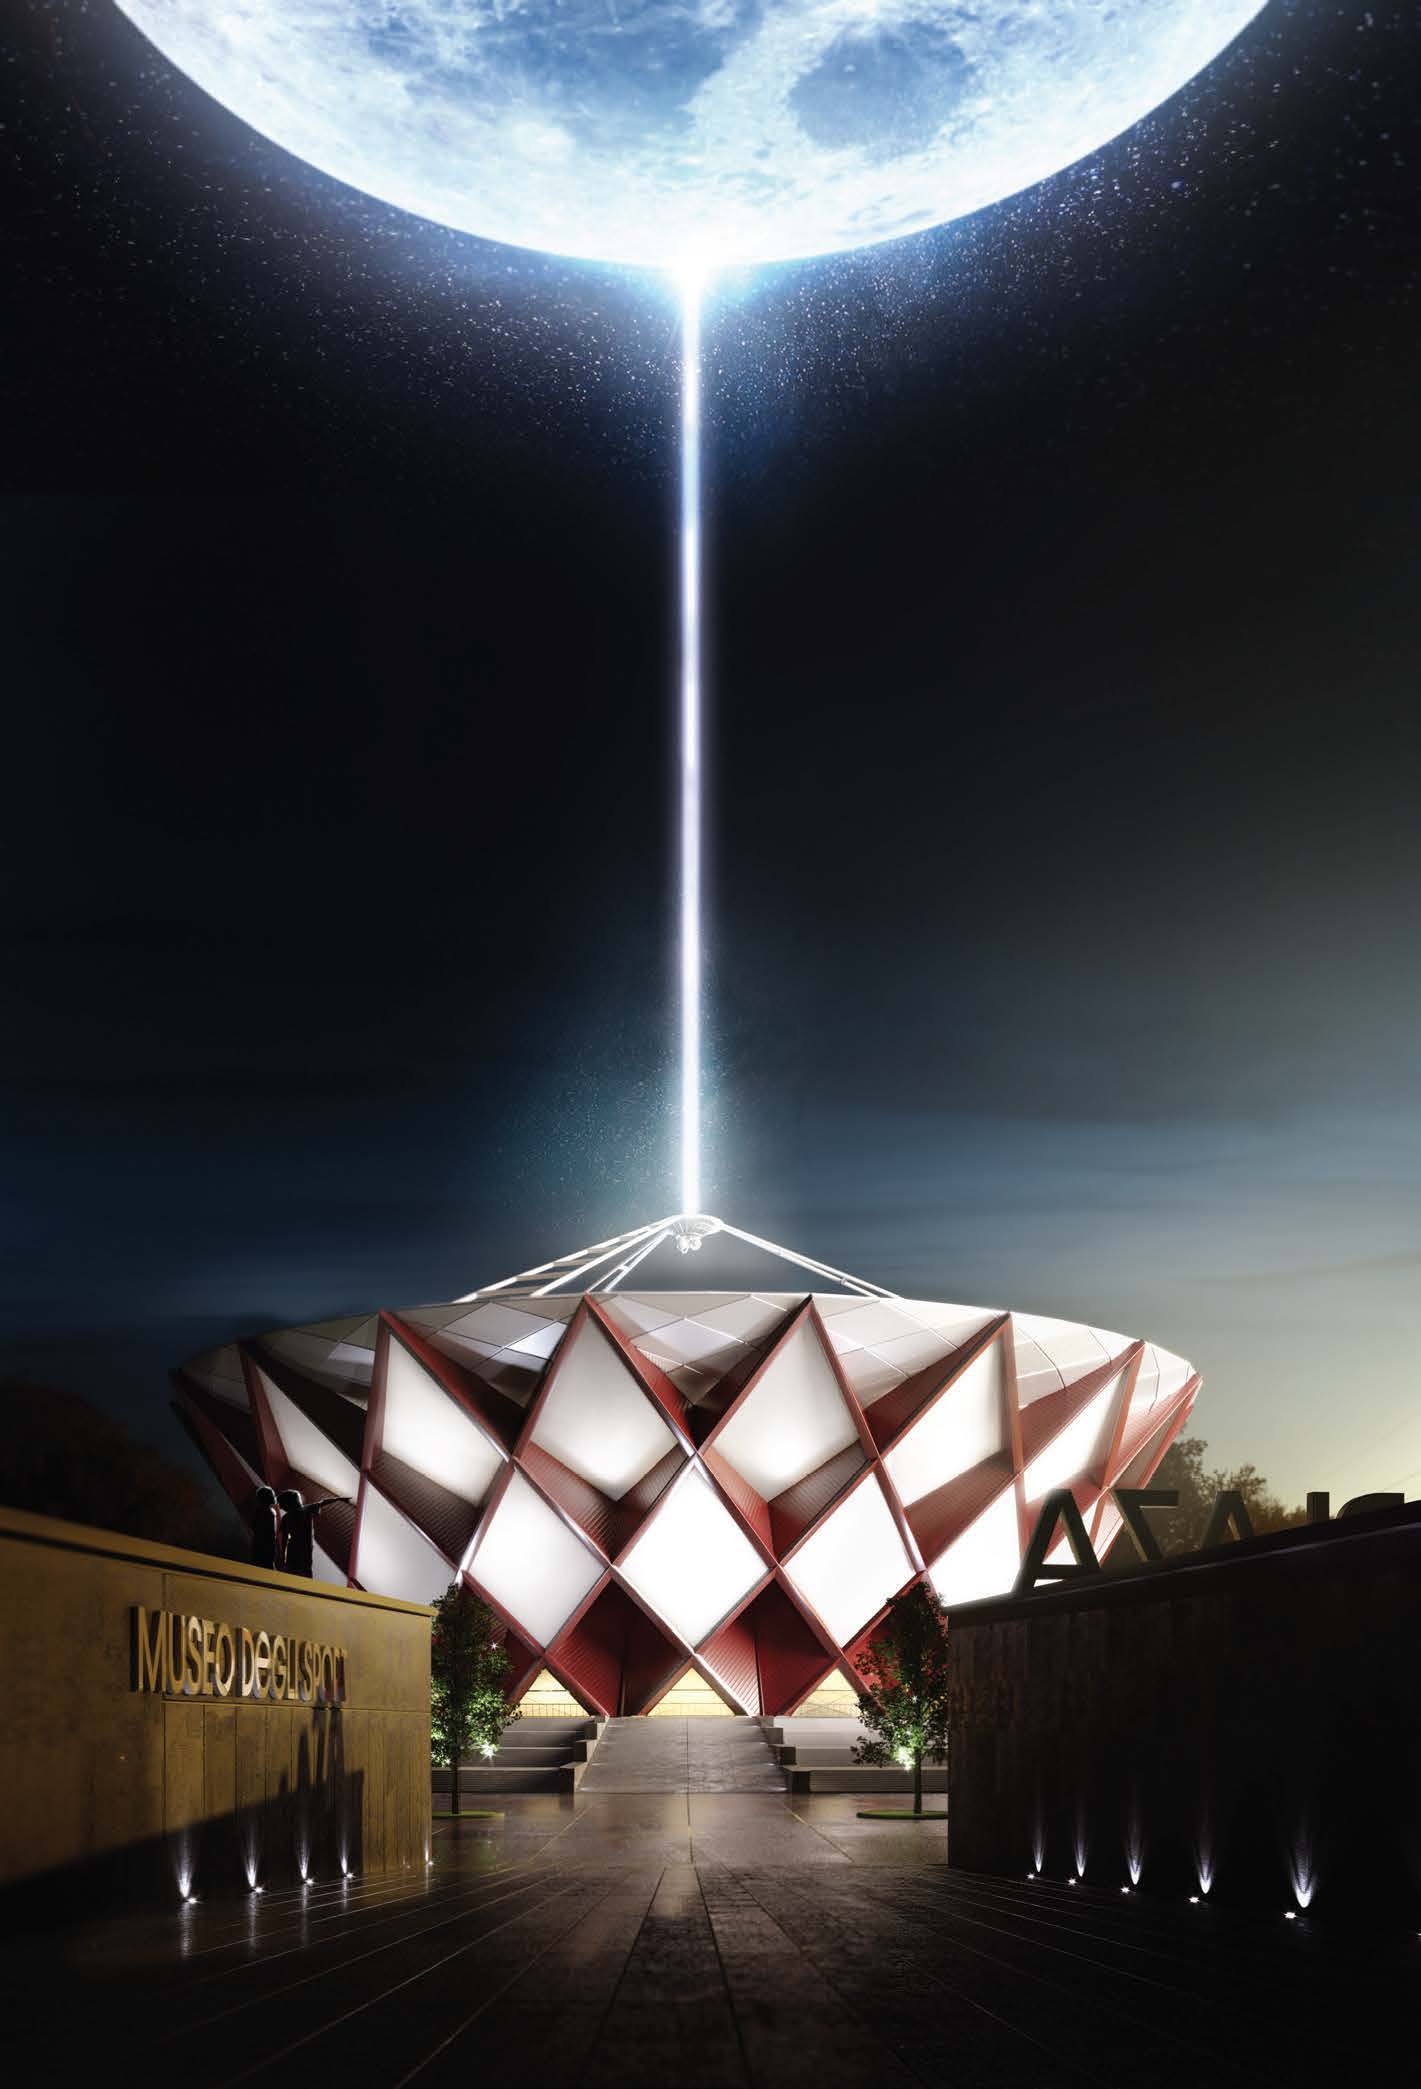
CONTACT by architects Iman Kimiaei / Maziar Mohit; visualization by Kimagination
5. Unleash your imagination
Most of the time, a subtle feeling of self-control leads us to avoid doing unnatural things. This is a great instrument for our social behavior, but when it comes to “creativity”, this aspect of our brain holds us back from creating something that stands out.
This can be very tricky and you can easily fall down on the other side. In order to understand how you can break the structure, you need to have an acceptable knowledge of the structure in the first place. That’s when tip number four comes in handy.
When I was creating the visualization CONTACT (above) as part of a series for the project Star Crown in collaboration with architect Maziar Mohit, I tried to create a composition with elements that can be naturally seen in everyday life, but as a combination, they create a single image that is separate from reality.
6. Be prepared
Whether you are using reference images from the internet, your own photographs or hand-drawn sketches, it is very important to prepare a solid plan before you begin. There are great artists out there who improvise during their creative process, but whenever I am about to work on a new project, the first few days of planning are the most crucial period of my workflow.
Especially for longer projects, writing notes and creating sketches can save you a lot of time later on. My tip is to use natural items for this part of your project, like a pencil and paper, instead of using electronic devices.
From Yasmin Tzeiman:
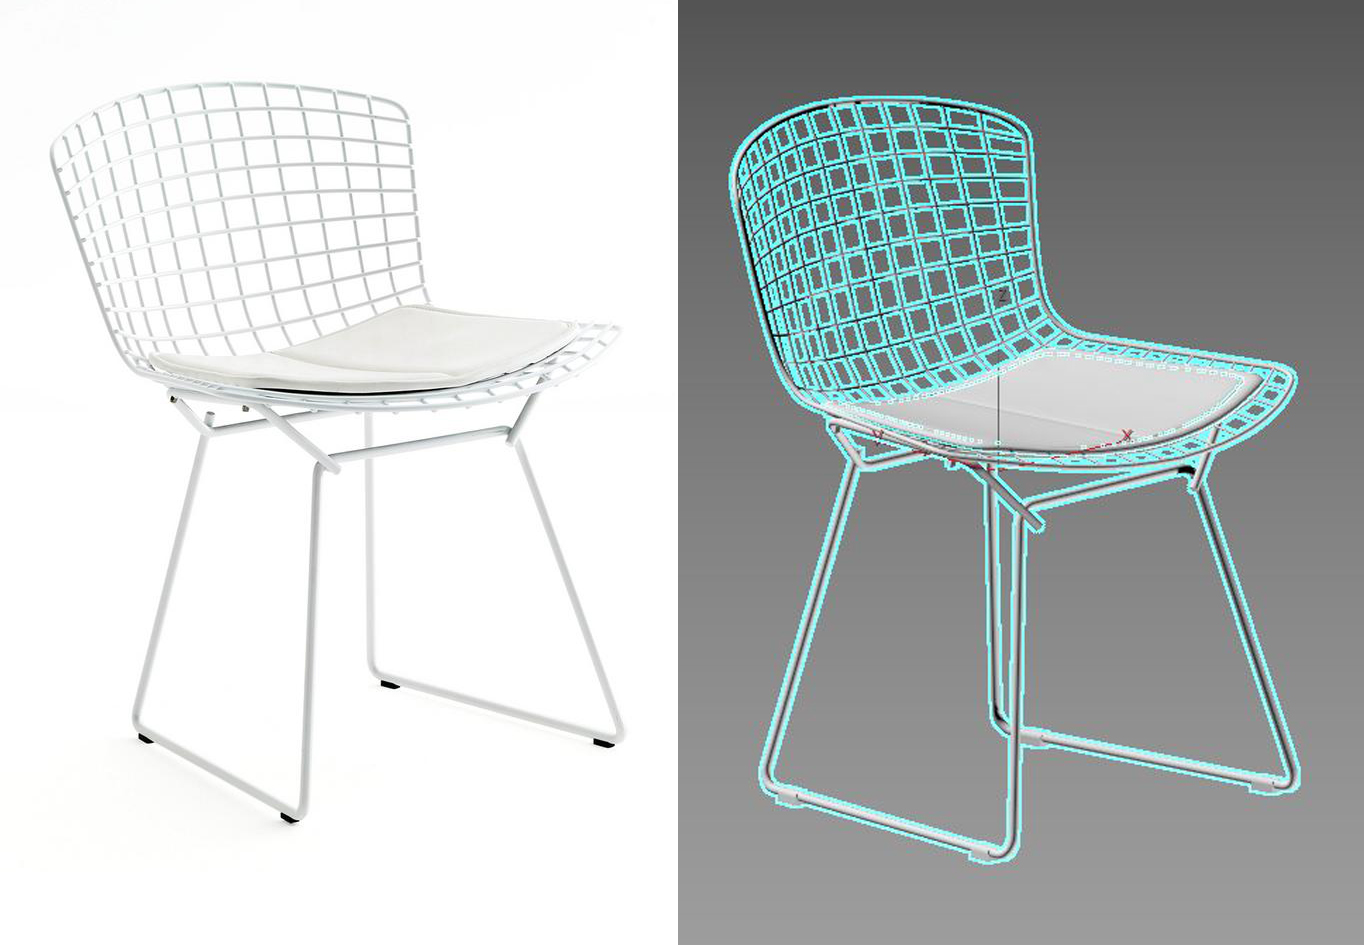
Left: A photograph of a real Bertoia Chair; right: A 3d model of the Bertoia chair; images via Studio Tze
7. Photorealism is not realism
We can create renderings by learning to use 3d softwares and render engines, but creating good renderings is about much more than that. My great mentor Ciro Sannino wrote:
“Live perception is one thing and photography is another. What are we really reproducing with our renderings: reality, or its “representation” through photography? That’s why I really like to use the term ‘Photographic Render’, to remind us that, in the end, what we are creating is actually a photograph.”
The geniuses who created 3D software and rendering engines made a fictional replica of how our world works, both physically and mathematically. Therefore, within that “fictional world”, we can recreate reality.
When we create a rendering we are effectively taking a photo: We are lighting a scene and taking a picture from a camera. Taking this into account will help you pay attention to how a camera works, which lens to use and how to illuminate the scene correctly. You should also take into account the composition of the image, the framing, the color balance, the focal points, among many other concepts within photography.
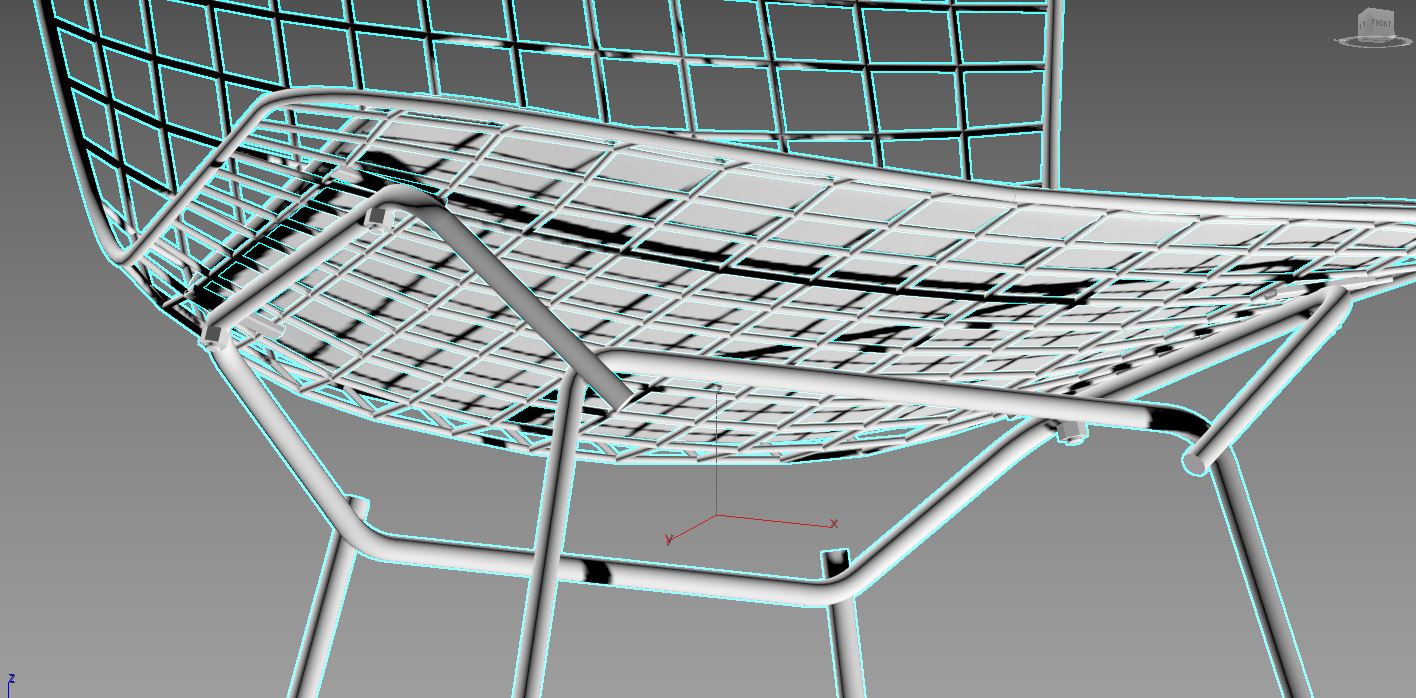
Detail: A 3d model of the Bertoia chair; image via Studio Tze
8. Model and Illuminate as in real life
As I said before, when we make a rendering we are able to recreate the real world. Therefore, for the rendering to look as real as possible, we must model each object with the greatest possible degree of realism. Take a look to the level of detail with which the chair above was modeled. These types of details will make your renderings look more photorealistic.
We should also illuminate the scene as we do in real life. Organize your lights and give them a clear hierarchy. Primary, secondary and fill lights are three elements you will have to use to obtain a three-dimensional effect.
9. Make materials physically real
To recreate materials with accuracy, we should learn how to “represent” them photographically. This means that we need to analyze how materials behave in real life, in order to create the best physically correct representation of them.
For this purpose, it is very important to observe them in detail. Begin by searching for pictures of the material. Investigate how the material looks when it is photographed in real life. Observe its properties, its exact color or map, its amount of reflection, refraction, its glossiness, etc. Then use all that information to make your material as close to reality as possible.
From Gabi Lagomarsino:
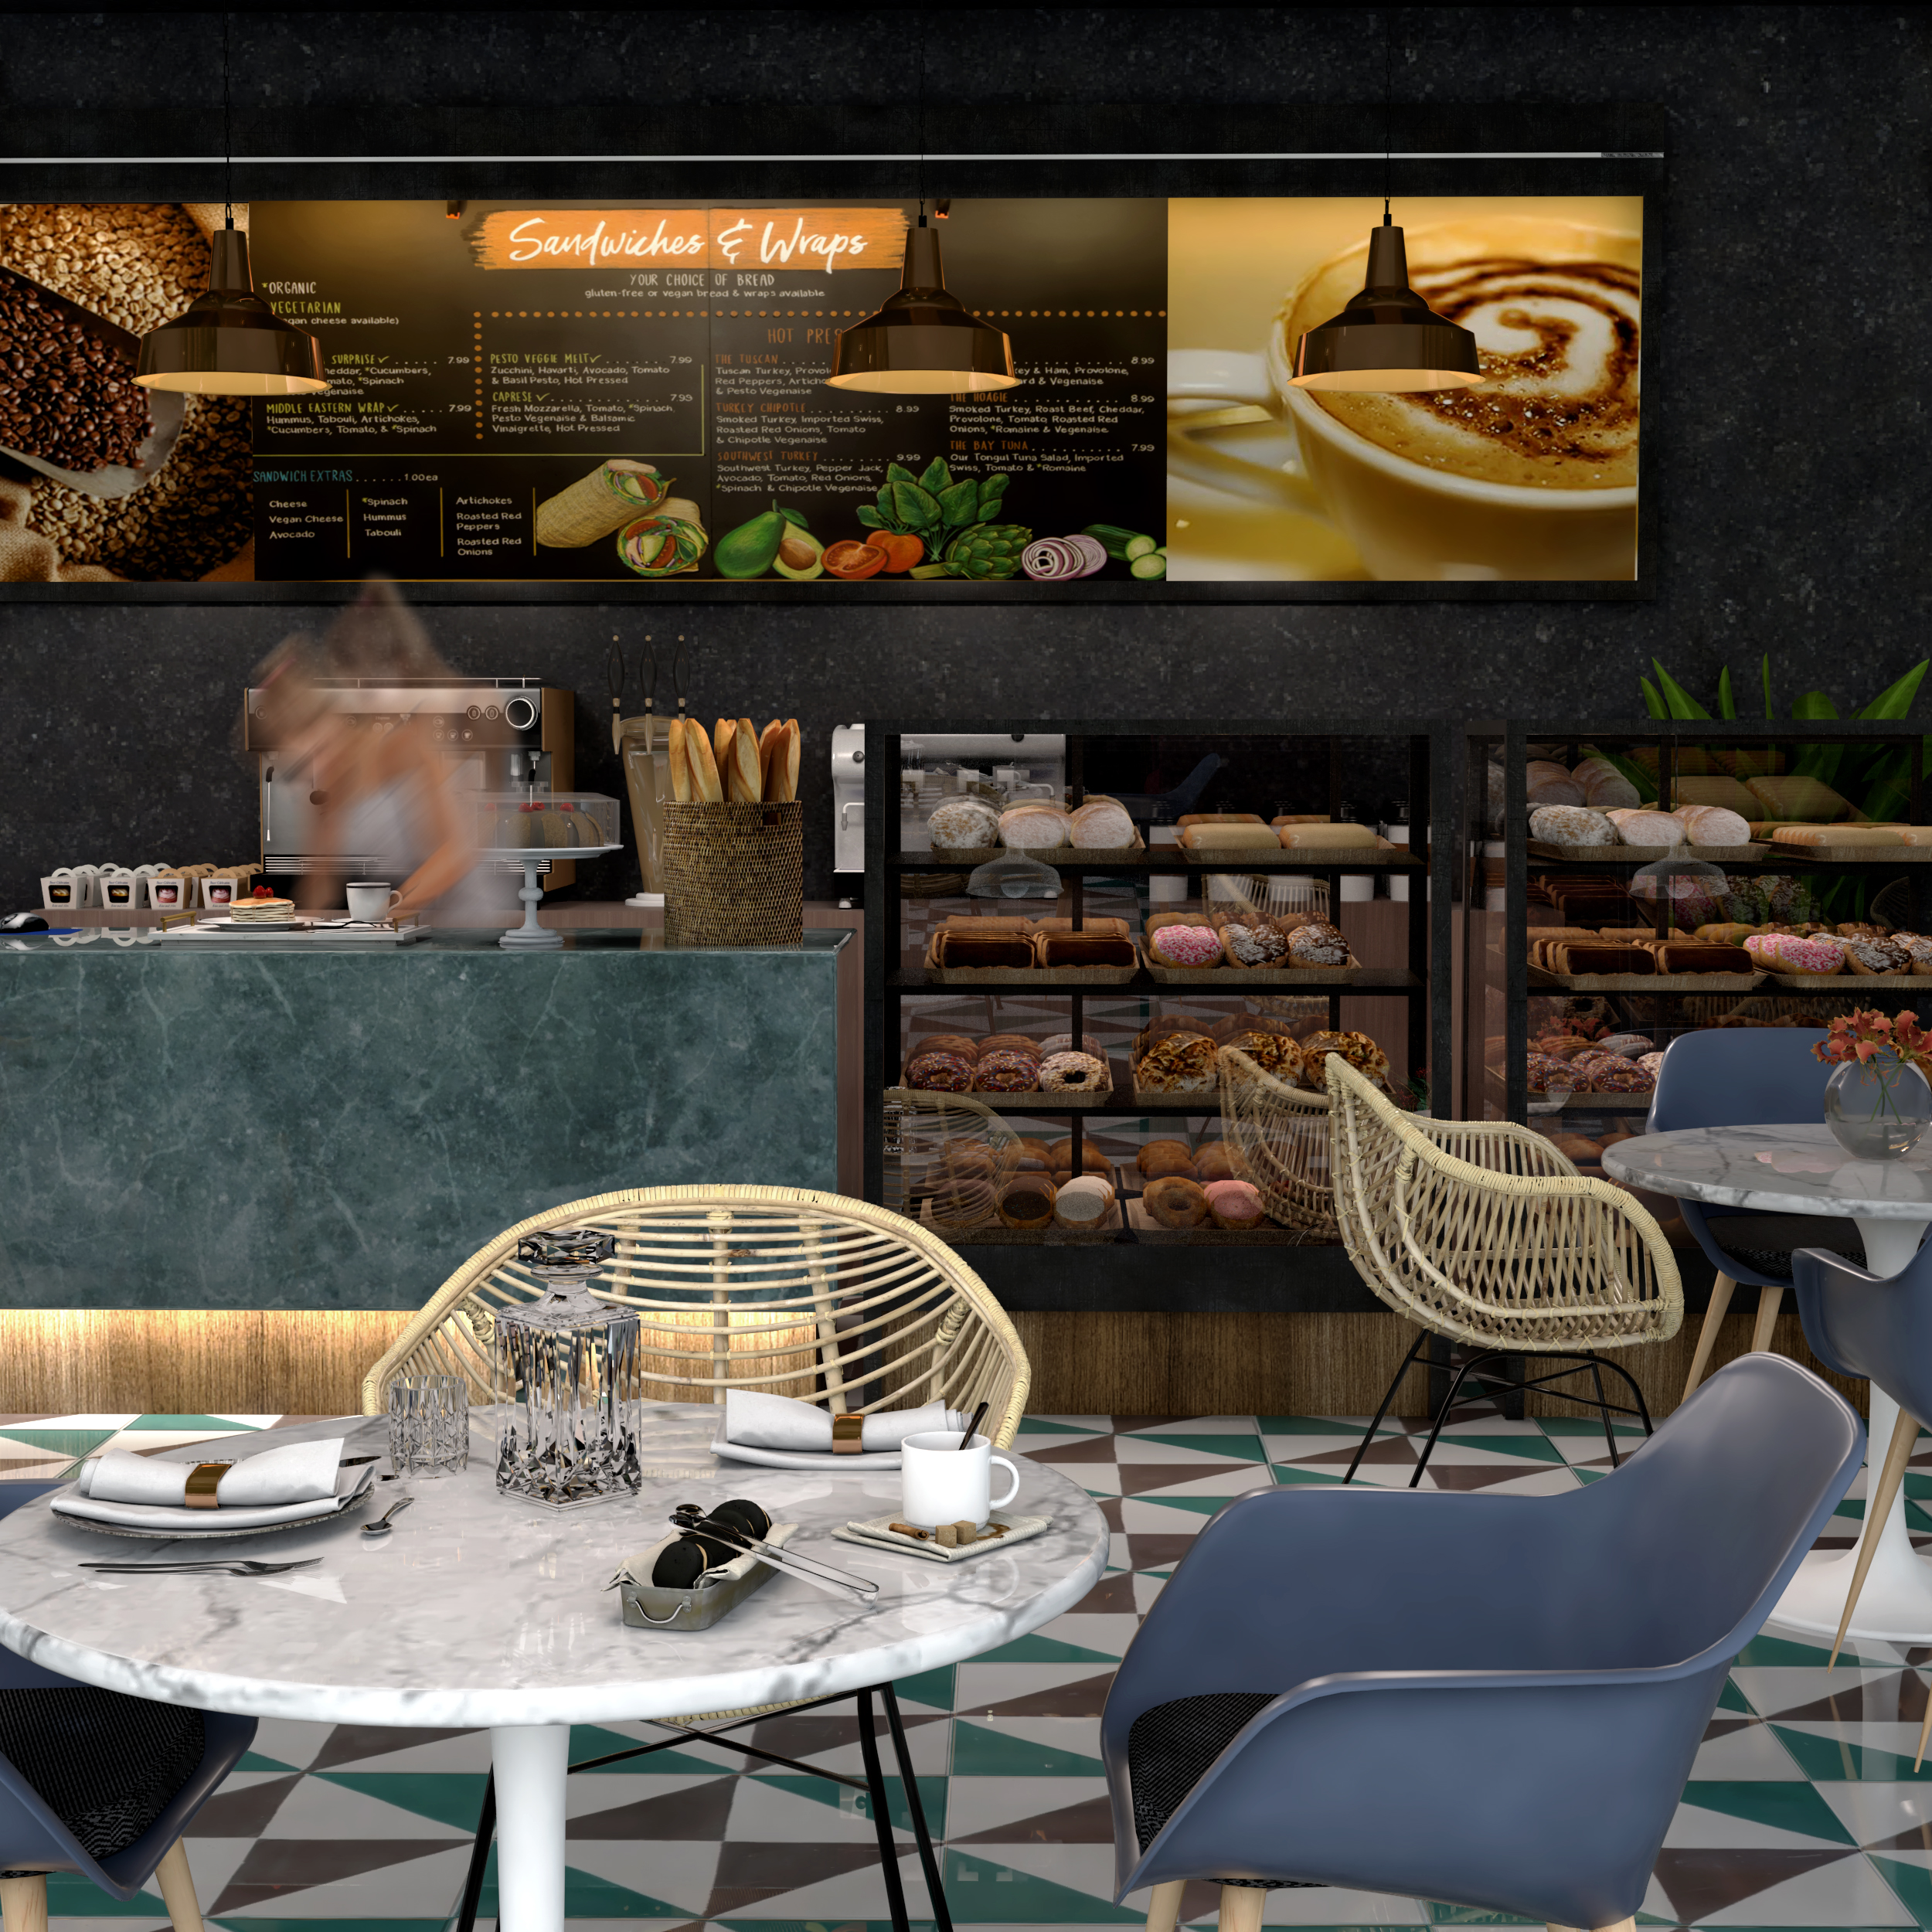
Rendering by Gabi Lagomarsino
10. Use high quality components
Components that are used to populate your scene are a key element. The more complex and detailed they are, the more realistic the final 3D rendering will be.
There is nothing that takes away more realism from a scene than seeing furniture and objects with rough or hard geometry.
Rendering by Gabi Lagomarsino
11. Master realistic lighting
Illumination is another crucial element. It takes a lot of practice and technique to achieve good lighting in a scene. It is not just about adding lights; those lights also need to look natural and real. Good illumination makes all the difference between an average and a well done rendering.

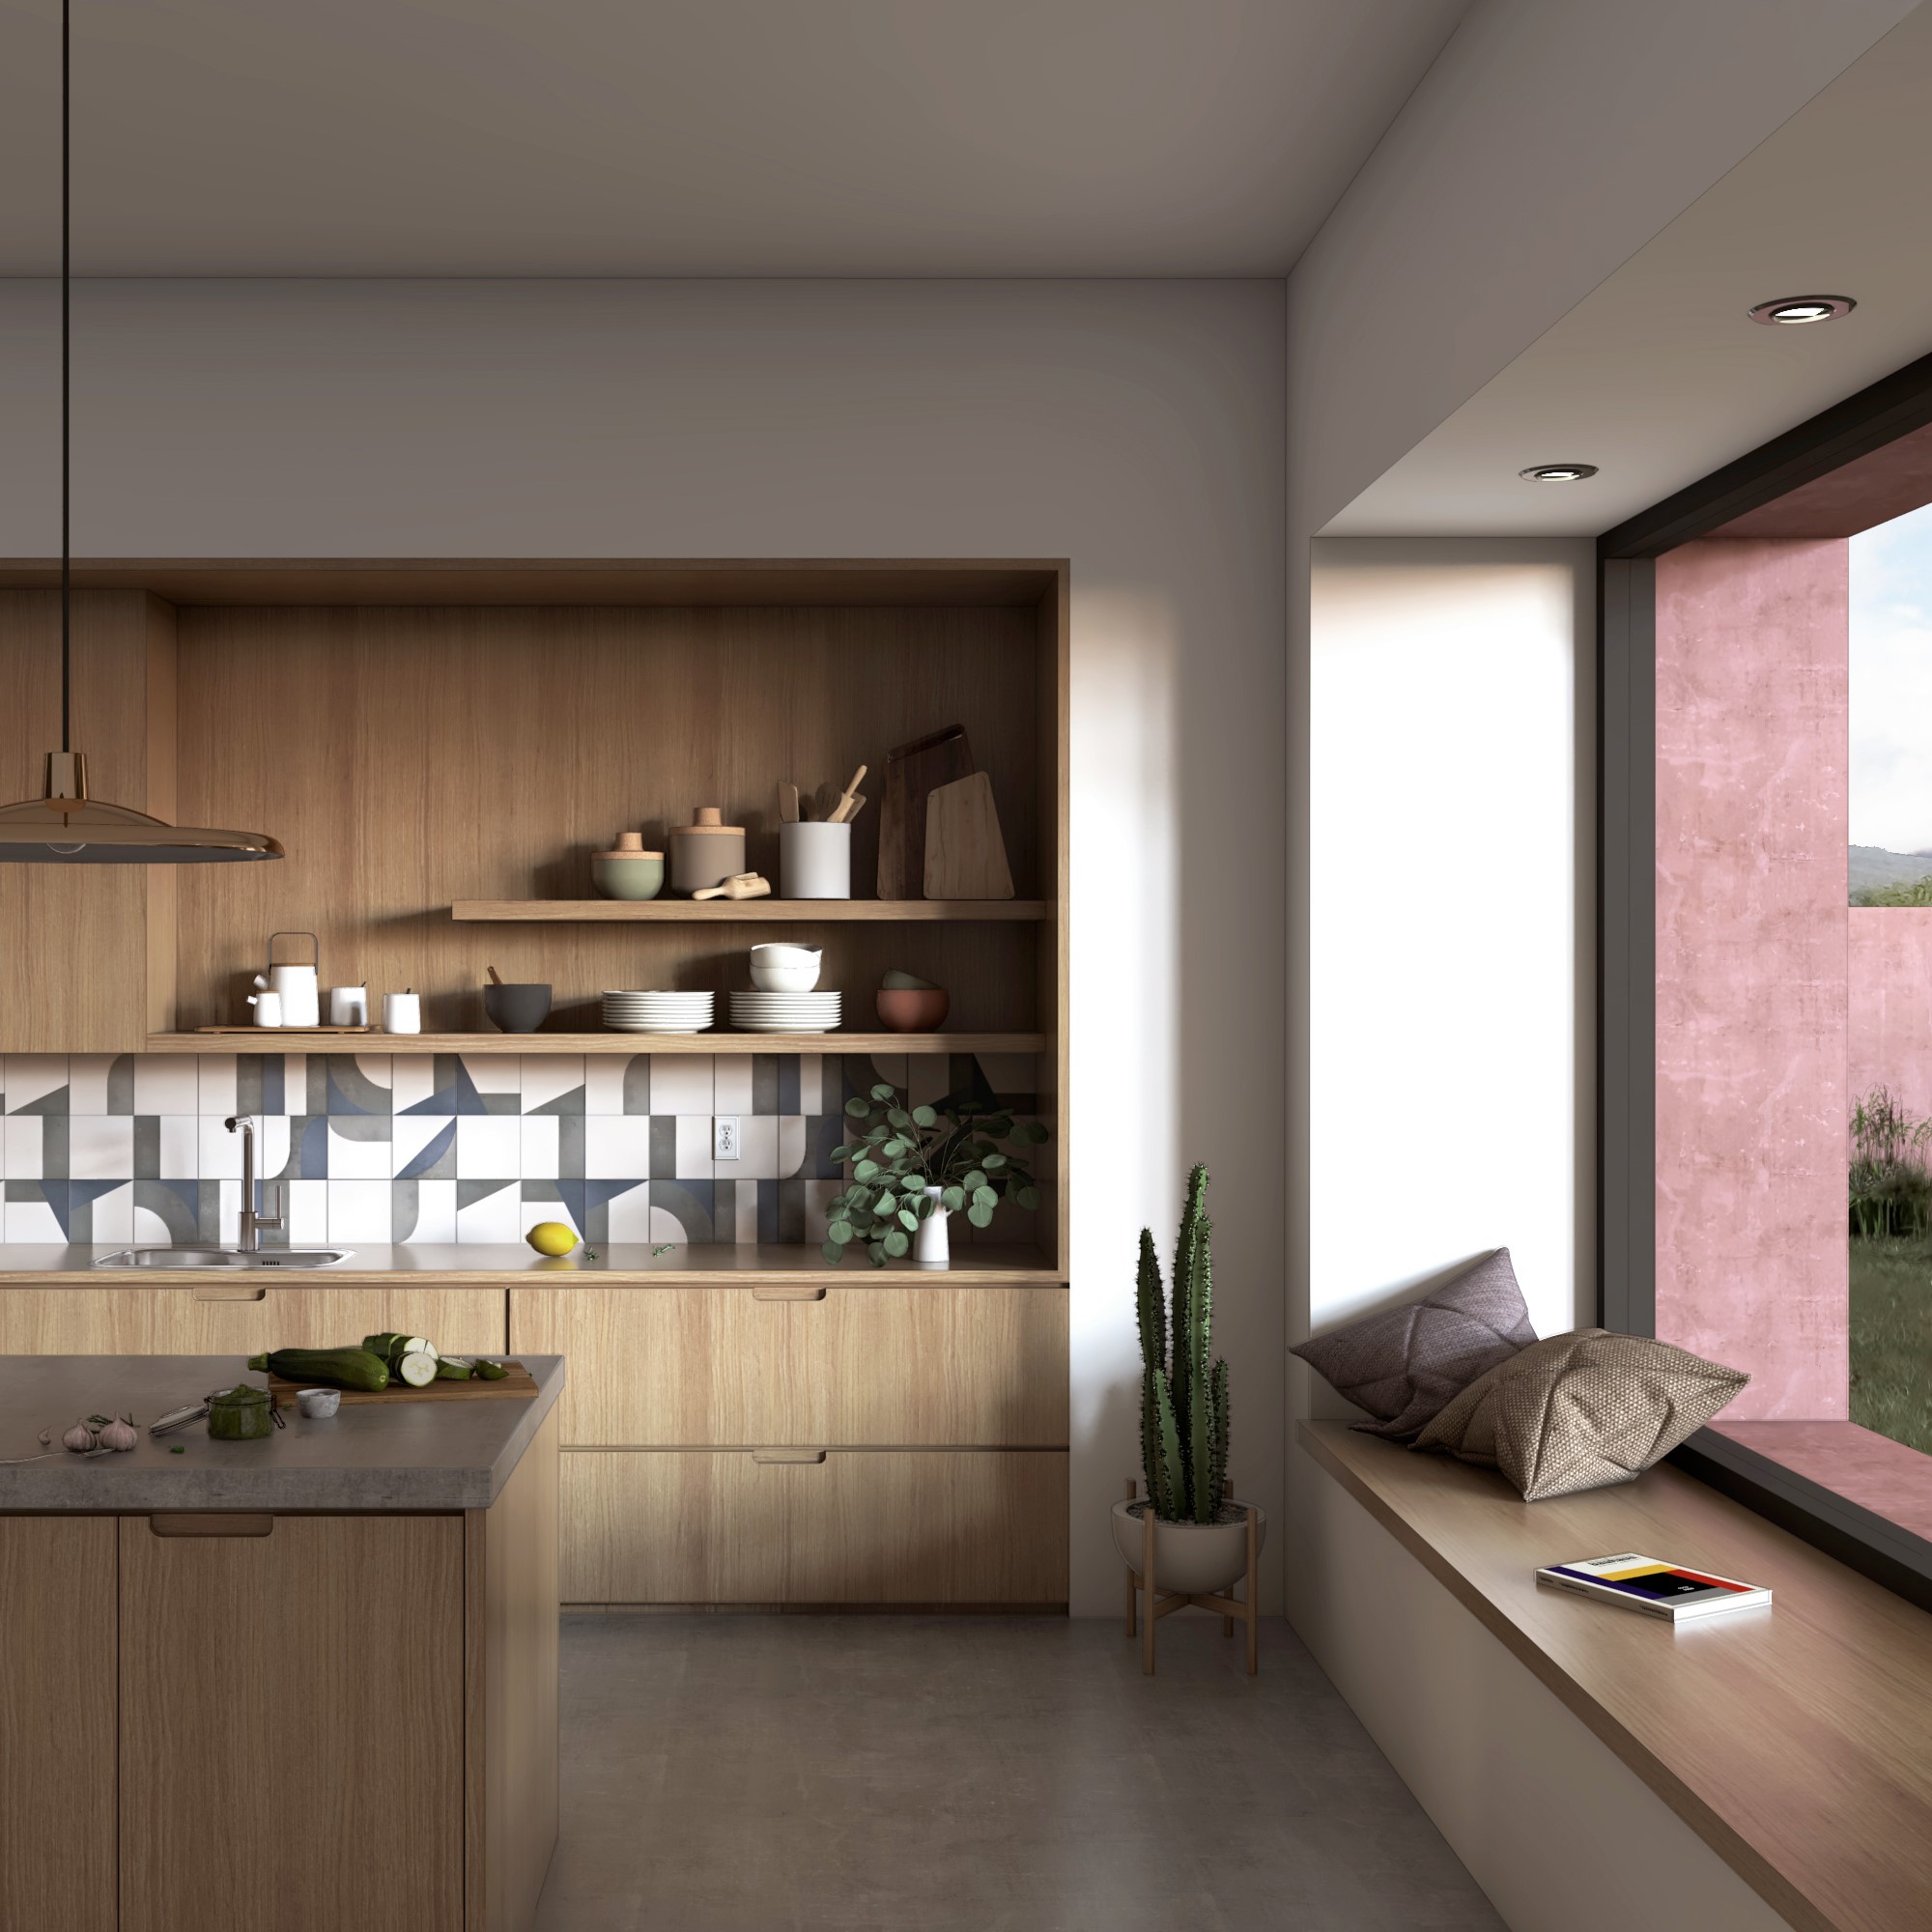
Sample image created for Detail Movement Interior; rendering by Gabi Lagomarsino
12. Avoid wide angle shots
Using wide angle shots can often lead to a bad composition. Sometimes it is better to show a small portion of the room (like the image above) rather than try to capture all of the space in a single shot.
To see more talented rendering artists’ work on Fiverr, click here, and to explore all Architecture & Building Design services on the platform, visit the store.
 25 Best Architecture Firms in Germany
 30 Best Architecture Firms in Ireland
 How an Award-Winning Architectural Visualization Studio Is Evolving in the Age of AI
 Southern Hospitality: 6 Charming Examples of Georgia’s New Class of Single-Family Homes
 Natural Wonder: 10 Examples of Arkansas’ Elaborate Institutional Architecture